🌵 Our DIY succulent wedding favours
For our wedding last year, our wedding favours were little succulents in small pots. It was my mum’s idea, actually, and I thought it was a perfect idea. Both Nick and my mum like plants and gardening (me less so, haha), and we thought that little succulents in pots would be very “us” and go with the overall theme and vibe.
My mum has a garden full of plants. She has a lot of succulents that she just lets grow, occasionally she splits them so that she can grow multiples. She has been out of gardening for some time as she has been busy with work, but she really spent a lot of time on her garden when I was younger.
My mum was extremely keen to grow a hundred succulents, one for each guest, and plant them in little pots. I was concerned that she wouldn’t be able to grow so many of them given how much time we had. She wanted to start early… I believe this was at least year ago, and winter in Australia is from June–August, and our wedding was in October, so keeping the succulents alive would be a challenge.
Getting a hundred little pots
It was already obvious that with about a hundred guests, we were going to need a hundred pots. My mum assured us she would have the succulents grown and that would all be sorted in time. I trusted her on this, haha.
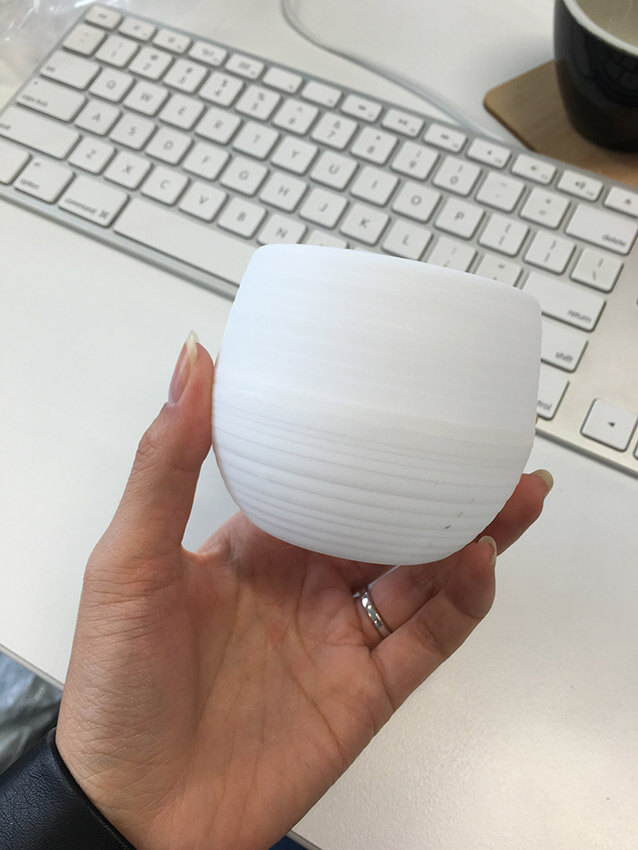
Initially, we had to think about the type of pots we were going to get. My mum, Nick and I did a lot of research online for inspiration on pots for small succulents. We tried a few different styles, including a tiny porcelain one, a plastic round one that could be opened to be drained, and various sized terracotta ones.
The problem with the porcelain one was that it would get waterlogged. There would be no way of draining it if there wasn’t a hole in the bottom for the water to escape when the plant was watered. That, and, the place my mum bought the pot from would likely not have a hundred of them on sale.
I bought a few plastic pots on eBay, which had a base you could remove and drain. It was really intelligent, in my opinion. My mum set one up with soil and put a succulent inside to test it out. It worked, and I was really quite OK to go with that, but after my mum planted the rest of them, we realised that they looked really cheap. Because of the weight of the soil, the bottom of the pot would come off quite easily as well, which could potentially create a giant mess. 🤔 The pots were also quite large, and in that sense, were a bit awkward.
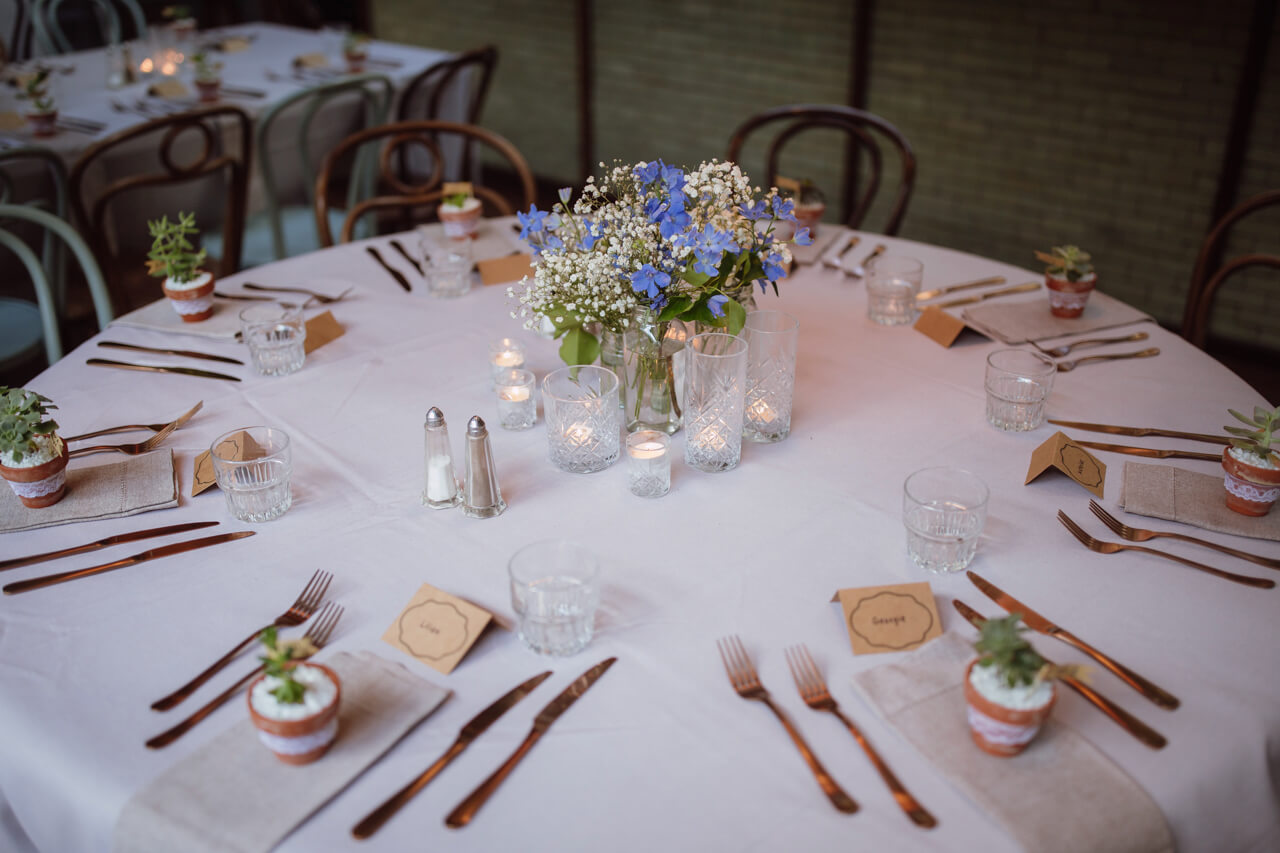
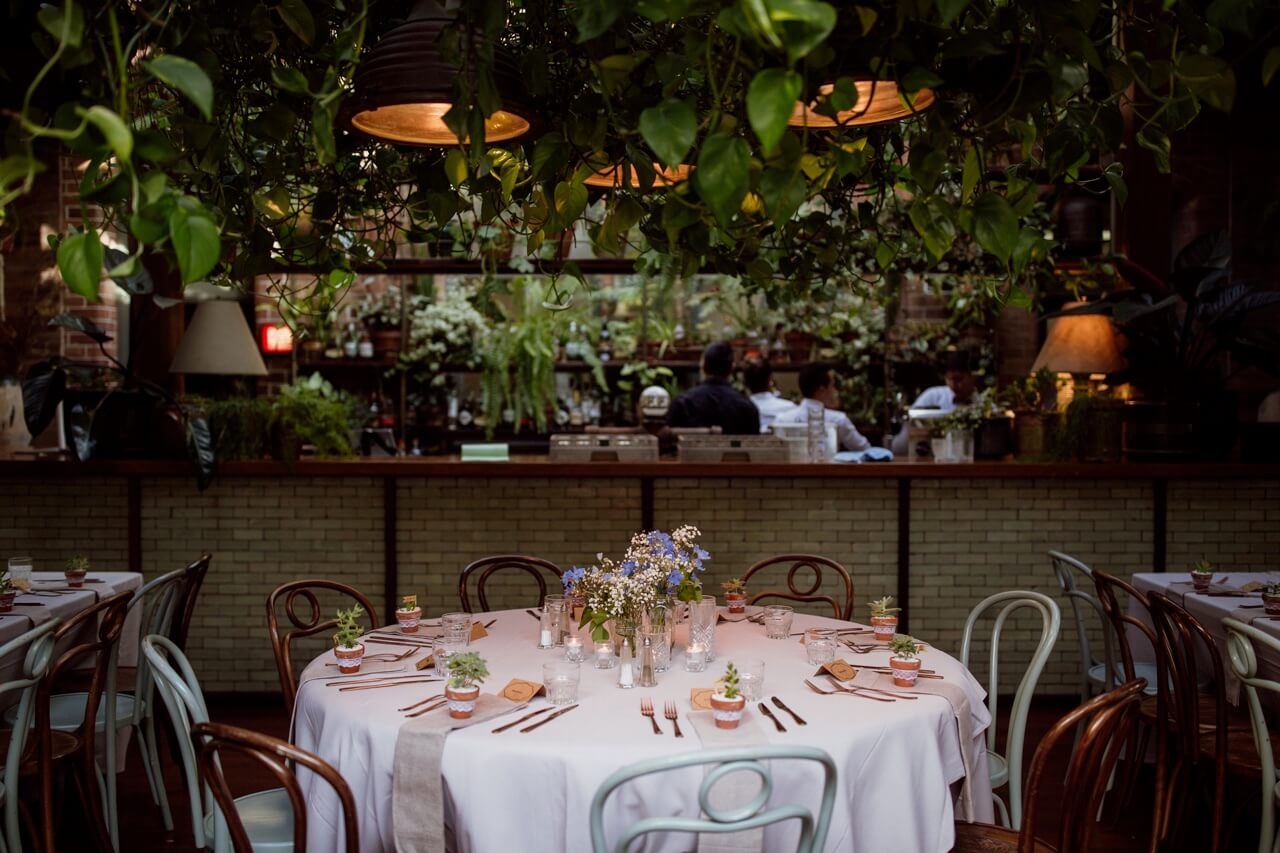
We settled on terracotta pots. I think we had a minor misunderstanding because I thought Nick didn’t like the idea of the terracotta pots! But we agreed that it matched our venue, The Grounds, quite well, and I really liked the “natural” look.
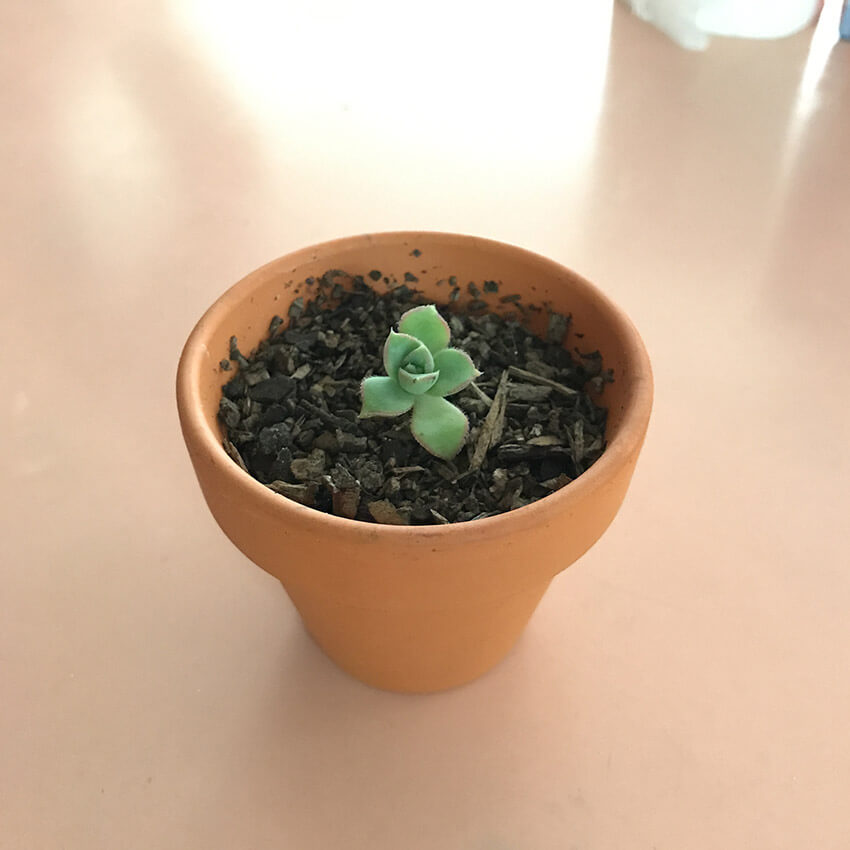
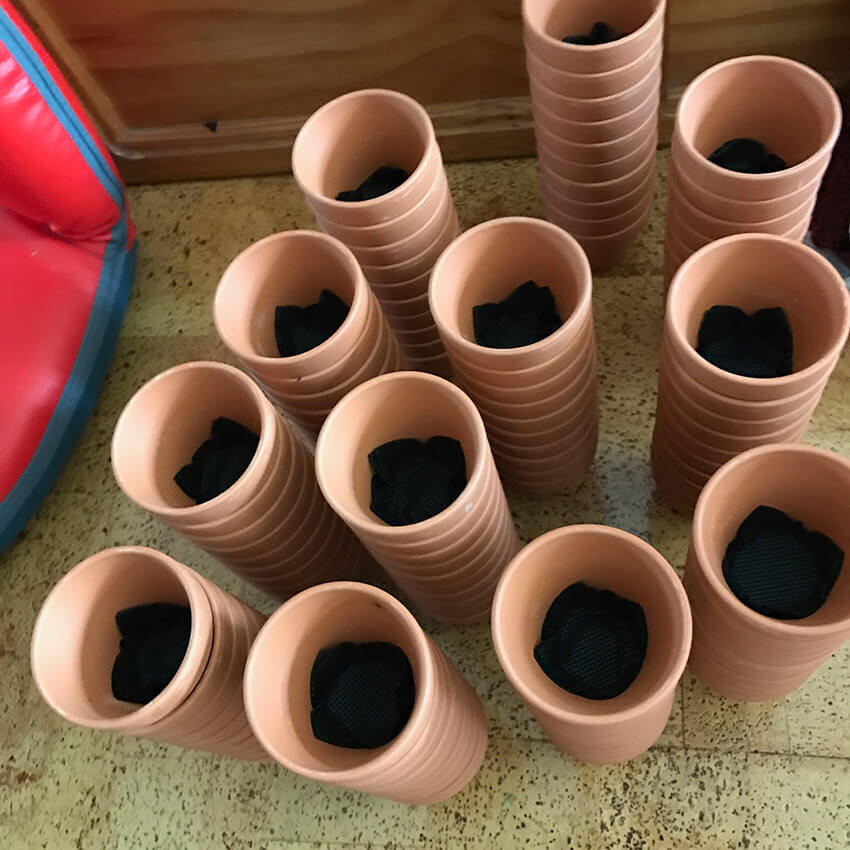
My mum sourced a few different sized terracotta pots from various places. In the end we decided on one of the smallest ones she got. It was a pot with a hole in the base as well, meaning it would be perfect for draining water. We went to a market near Nick’s parents’ house and purchased about 110 pots from the gardening area there.
The man was curious as to why we were buying so many but I kept my mouth shut; my mum seemed to know what she was doing. The man actually asked if it was for a wedding, and my mum put on a surprised look and said, “Oh no, it’s for a hobby, we want to make many…” I think the man asked again and my mum just kept shaking her head. I think we got the lot for less than $100 since we were buying so many.
I just wanted to point out that it’s ridiculous that prices are so inflated when you mention something is for a wedding. We were going to put in the hard yards to create these succulents from scratch, so why charge more for the materials we use? Gosh.
Lining the pots with fabric to avoid spillage from the bottom
My mum had tested out some of the pots and planted a few succulents. Unfortunately, she noticed that a bit of soil was falling out of the holes in the bottom of the pots quite easily, even though the hole wasn’t that big. When the plants were watered, there was an even bigger problem – the water pretty much went straight through the pot. 😓
We had to line the pots somehow. Because Nick does a lot of work with bonsai, he had some heavy duty mesh wire that we tried to use to line the bottom of each pot. It didn’t work out though… the holes between the wire were too big.
I think my mum also tried out some mesh that she used for gardening but water still spilled through. In the end I spent several hours cutting up thin netted fabric in 2–3 layers, and lining the pots with those. It wasn’t quite enough to line just the bottom of the pot, though, so I had to cut a square and have it line the insides of the pot too.
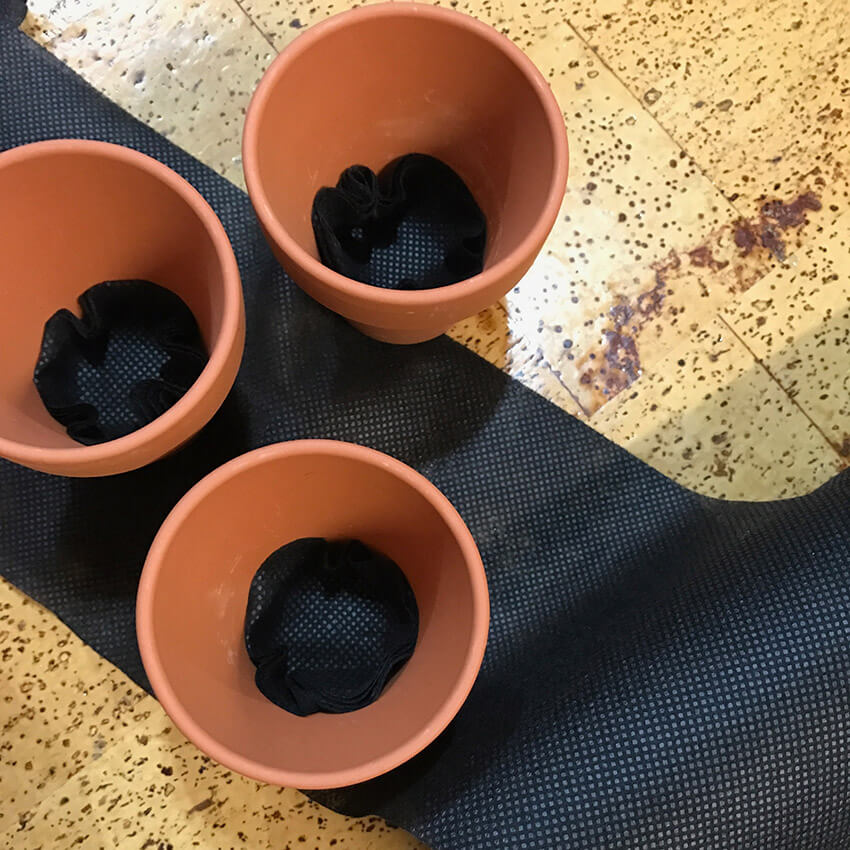
The fabric proved to be good at stopping the water from totally dripping through, though, because it absorbed some of the water but not enough for it to get waterlogged. After that, my mum was able to fill the pots with soil and plant the succulents!
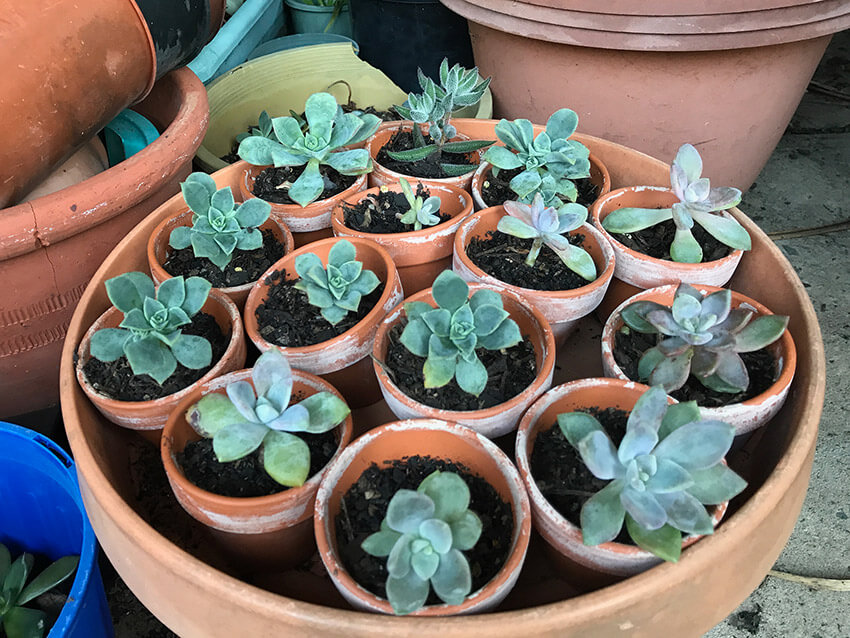
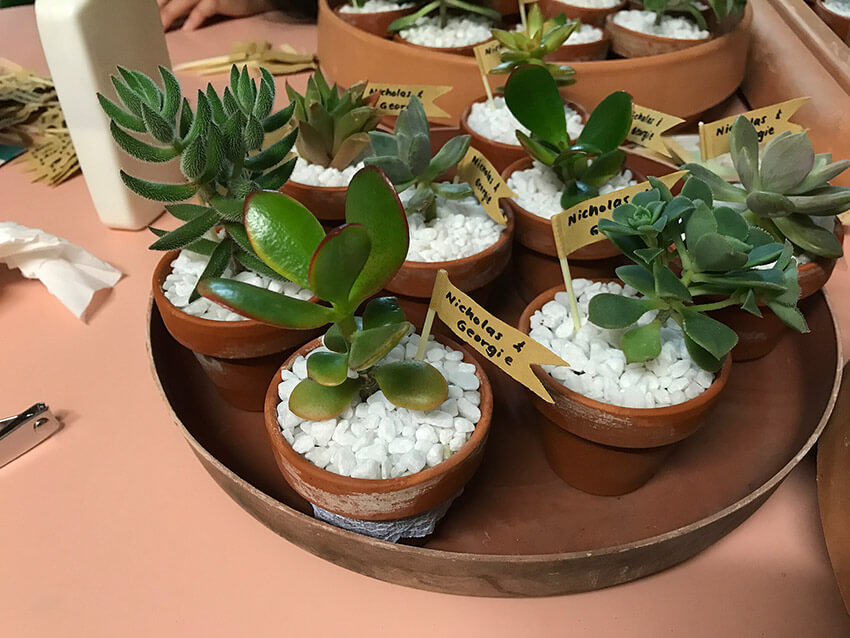
The planted succulent collection
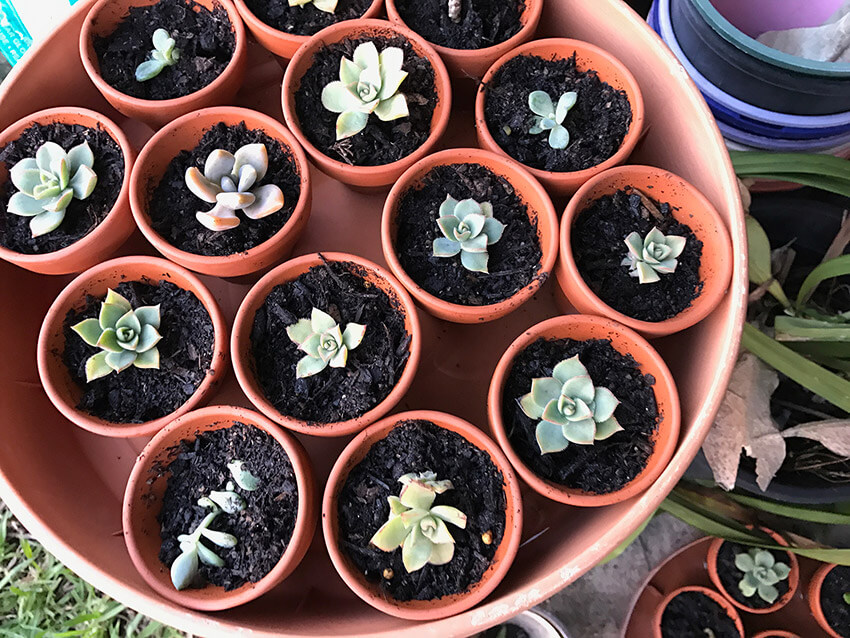
It was about six months before the wedding that my mum planted all the succulents. Nick was actually surprised that my mum had so many “hiding” in the garden. He didn’t think she had that many, haha. In fact, my mum had more than enough succulents for the 110 pots we purchased.
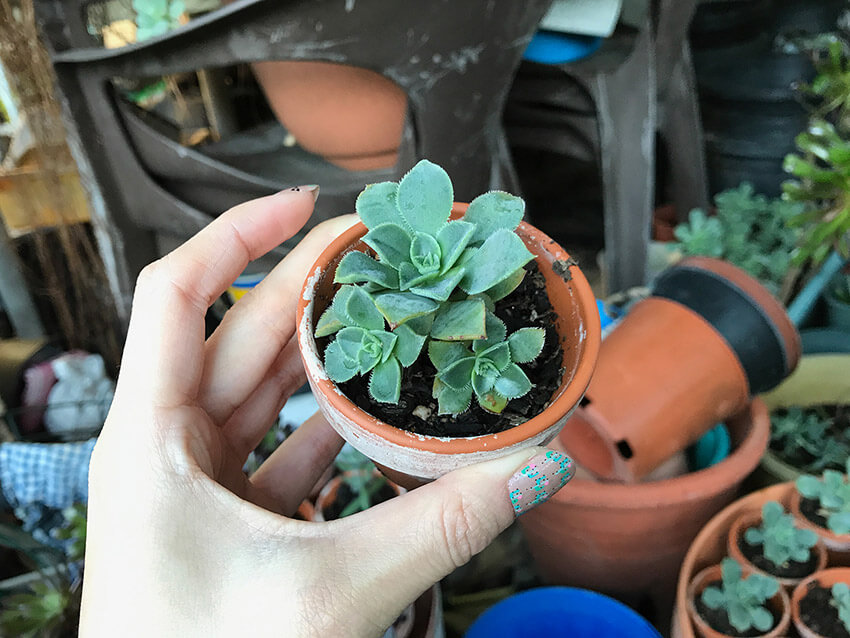
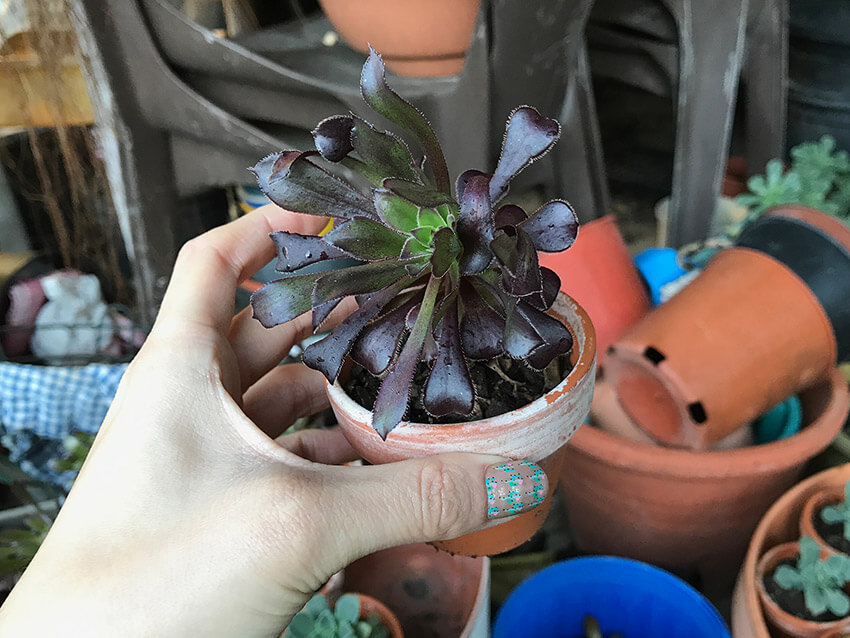
As a precaution we actually bought a couple of new succulents, which were a little nicer than some of the ones my mum had. When people think “succulent” they think of little cactuses and plants whose leaves have that “shiny” look, right? My mum had a few that looked like little trees and we decided that we’d try and phase those out from our collection. I was under the impression that some people wouldn’t think they looked nice enough. 😆
Finding something that worked as labels for the plants
I had a couple ideas for plant labels. One was to wrap the pots with hessian and use brown twine to tie a label around the middle of the pot. Hessian turned out to be too expensive per roll and the whole plant would look too busy.
The label was going to have our names and the date, and I did want to include something like “I grow with love”… you know, something cheesy because it’s a wedding thank-you gift and if you take care of a plant like you do a relationship, it grows. Duh. 😅
I decided it would be best to create a label that was like a small flag stuck inside the pot with a stick. There was no way I was going to create the labels by hand. My poor hands were already crying from so much DIY. 😆 I had gotten a toothpick and cut a nice piece of paper and written “Nicholas & Georgie 21.10.17” on it, taping it on the toothpick and sticking it into the soil of one of the pots we were working on. I told my mum that’s what I wanted it to look like, and I really, really didn’t want to have to make a hundred of these tiny labels. 😦
Lilian and I went to the art store. I knew there must be a store somewhere selling little flags with toothpicks. I considered sticking wooden sticks (like the kinds you use for craft, and the ones that hold some individually wrapped ice creams) into the pots, but they were all too large and looked really weird. They had some kind of flags on sticks, that looked like what I wanted, but they were patterned.
The art store also had tiny chalkboards, where you could write a message on with chalk. They were small enough, and worked well with a pot plant, but they were really expensive and not worth buying a hundred of. Even thinking of making my own chalkboards and cutting up wood was going to be too much of an effort.
My mum and I went to several art stores together to look for something similar. We found a discount store that had the perfect little flags in a light yellow/brown colour, and a plastic pick attached. I don’t remember how much it cost, but we bought two bags, which was more than enough, and it cost about $25. In that same purchase we also bought brown name cards that I was going to handwrite for the guests’ names. 😄
Sourcing lace to decorate the outside of the pots
We also weren’t going with the hessian wrap because my mum had an idea to line the top of each pot with lace. I thought this was really too much detail, and I would have been happy to go without it, have the pots looking more “raw”. But after looking at a bunch of photos online I didn’t mind the idea.
We went for subtle lace. Because the top of each pot was about 13 centimetres before stepping to a narrower point, the lace had to have that as a maximum width. We went to Lincraft, a cheap craft store, and looked in the entire shop at all the white lace they had. I got so laced out. 😝 We already measured how much we needed, by measuring the outer rim of each pot and multiplying by how many pots we had. I think it was about 25 metres in total.
We ended up getting two types of lace because there was not enough of one type in the store. They were similar enough – I mean, it didn’t matter that much if they were a little bit different.
Finding pebbles to top the soil
The typical style of tiny succulents – including the fake plastic ones you can buy at your local department store – has pebbles topping the soil. Usually the pebbles are white or earth-coloured. This is fairly typical of bonsai, too. Nick loves bonsai. 😊
My mum and dad helped search for the right pebbles. I think they had to go to several Bunnings Warehouse stores before they found some that had white pebbles in stock. The white pebbles we chose seemed to be very popular. They were a very pure, bright white. There was an abundance of coloured versions in stock but we obviously didn’t want those.
Initially we bought a couple of bags thinking it was enough for over a hundred pots but we were quite wrong, haha. My dad had to do an emergency run to get some more before they possibly ran out. We could not afford to wait for new stock or try to find something else for the remaining pots!
The pebbles were small enough to cover the soil atop each pot without showing any of the soil underneath.
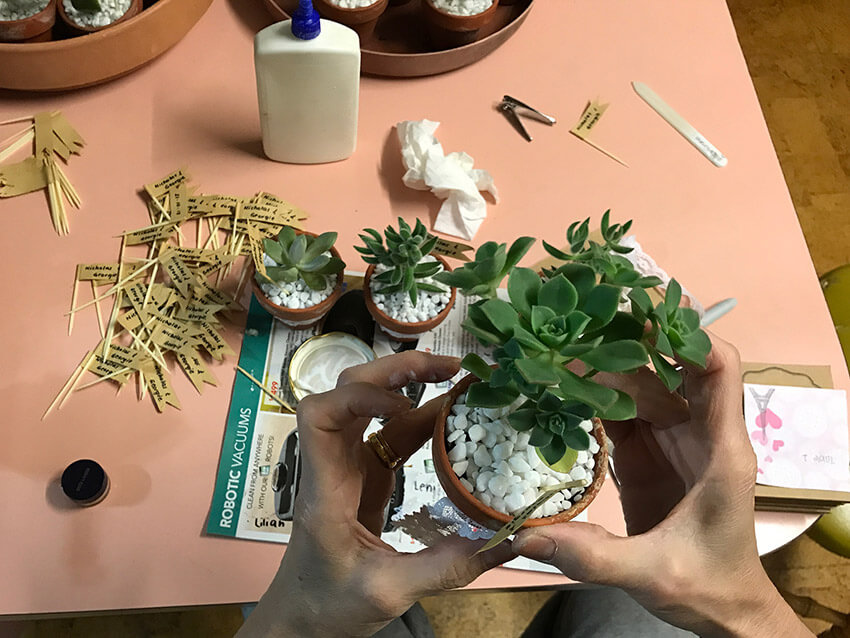
A day of writing and assembling
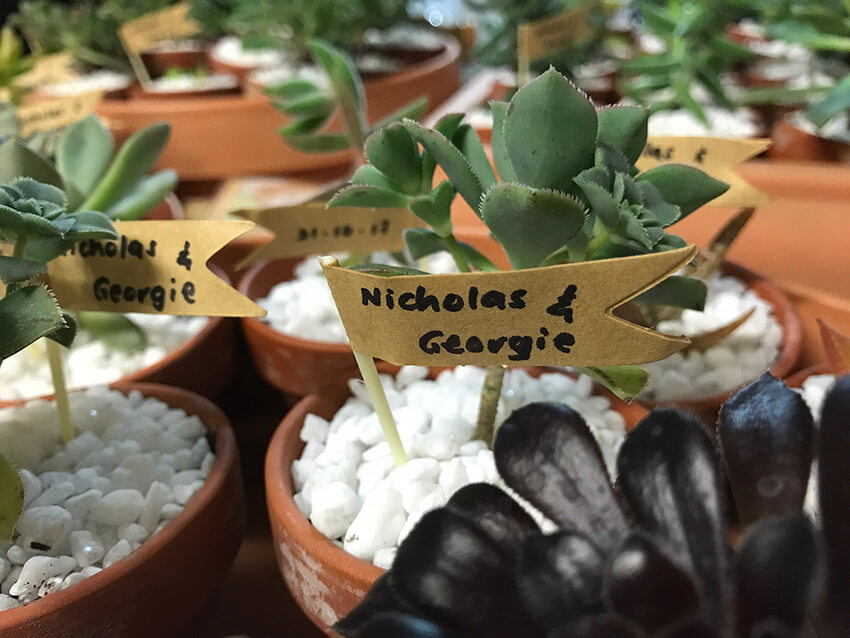
Lilian came over one night and we spent several hours writing out the labels on the flags, and glueing the lace to the pots. We used a marker for the flags. Later we found that the marker ink ran when the plants were watered, so we had to be careful not to wet the flags. My mum pointed out that had we used pen, the ink might not have run. Oh well. 😅
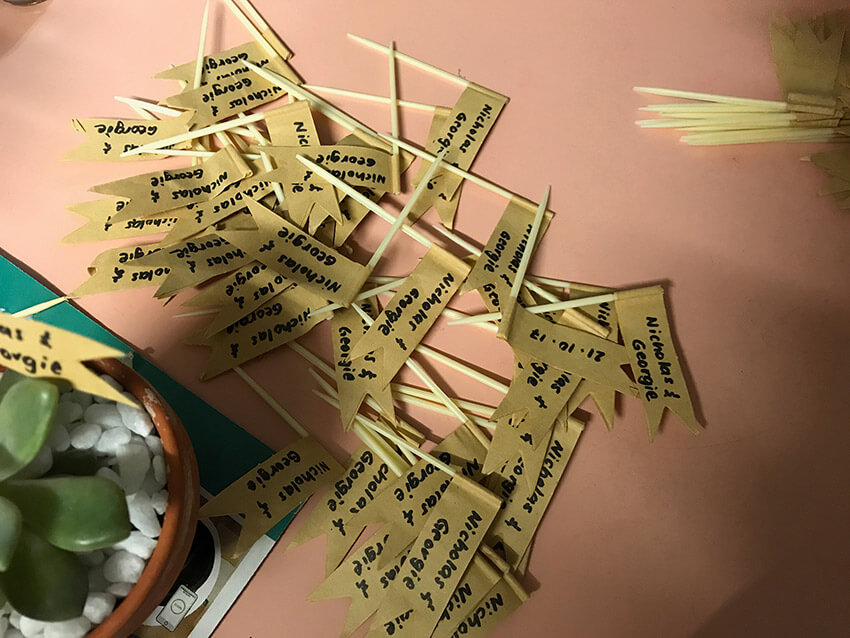
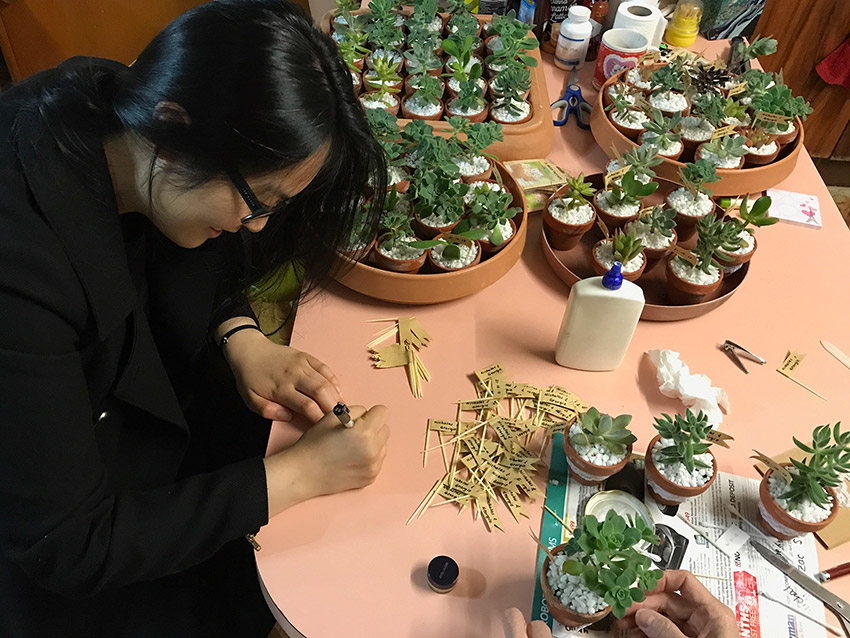
On one side of the flag we wrote “Nicholas & Georgie” and on the other side we wrote the date as “21.10.17”. Some of the succulents had grown so much at this point that it was almost impossible to find a spot to stick the flag in the soil!
After cutting the lace into long-enough pieces to go around the pots, we used some pretty basic craft glue to stick the lace on. It was difficult not to make a mess with the glue. We tried coating the glue on the lace, and also putting the glue on the pot first before sticking the lace on. I’m not sure which method was more successful or faster, but I can tell you that it definitely got tedious after some time.
Stopping the pebbles from spilling… glue?
Now I must admit, this part was a pain in the ass. And I must give my mum credit for doing most of it. She did some research and asked some of the staff members at Bunnings what glue would be suitable to hold the pebbles in place. It was a tough one because we wanted the pebbles to stay put. They had already caused issues when we accidentally knocked one over and the pebbles went everywhere. It was bound to happen during transport and on the day of the wedding. 😨
The other thing we had to keep in mind was that the plants still had to be able to be watered, so we needed a glue that was somewhat porous. My mum had tried some craft glue but it wasn’t strong enough, so she got another type of glue from Bunnings. She only bought one tube just in case it turned out to be a huge fail.
It took the glue probably 24–48 hours to completely dry. We tried a few pots at first and tried to water them. The water still came through and the bottom of the pots were wet, so as long as we didn’t put a crazy amount of glue, it wouldn’t seal the soil in.
Transporting the plants
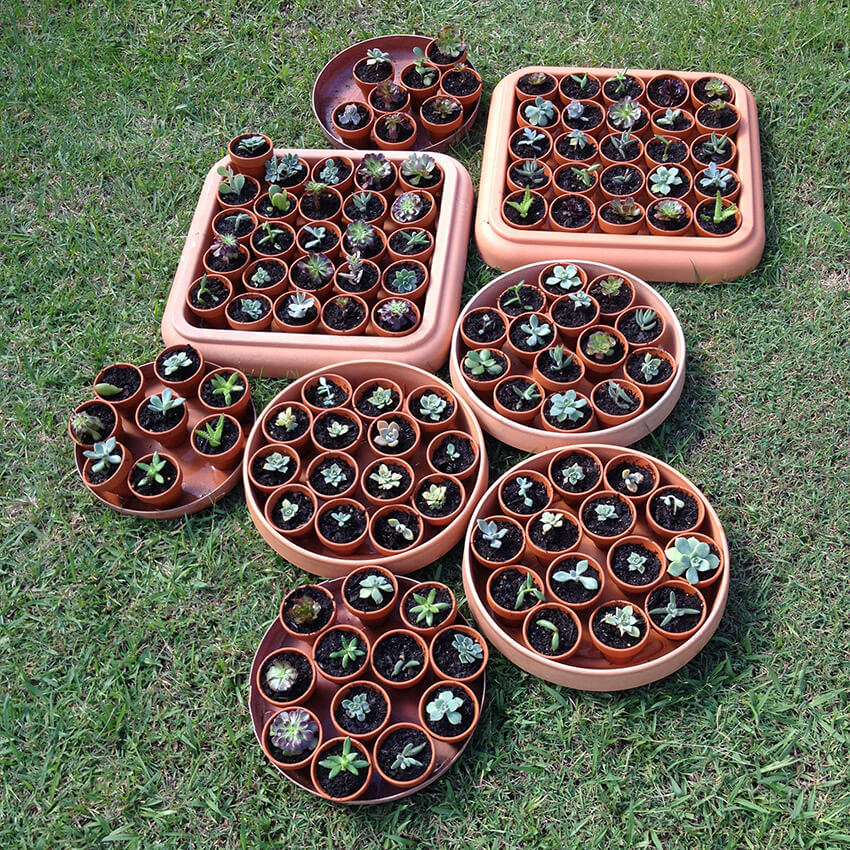
I hadn’t even thought of this until, like, a couple weeks before the wedding. My mum had clearly thought about it, though, because she had some trays and boxes ready and brought up the topic.
Prior to the wedding we had to organise a day to drop off anything required on the night of the wedding. This included the favours, the placecards for the table, the seating plan, and the wishing well.
Because our apartment is near the wedding venue, we decided to transport the plants from my parents’ place to our apartment the weekend before the wedding. My mum had set up various trays inside sturdy cardboard boxes with the plants all tightly packed inside. We used some bubble wrap and tucked old rags between the pots to stop them from tipping over. We put a few boxes in the boot (trunk) of the car and some on the floor of the car behind the passenger seat. I sat in the passenger seat and held a box on my lap as well as having a tray at my feet.
The plants arrived safely! While they were at our apartment we watered them generously, and a few days later, during the week, we put them all back in the car in the same fashion and dropped them off at The Grounds. Squeeeee it was getting exciting!
Bags for guests to carry the pots home
My mum contacted my cousin Anggie who was able to help get a hundred sturdy gift bags on the cheap. Anggie, as well as a lot of my family, were coming to Australia from Indonesia. My family ended up bringing the gift bags on the night of the wedding since we weren’t able to collect them in time to drop them off at The Grounds on our selected drop-off date.
It somehow didn’t occur to us until much later on that my family from Indonesia wouldn’t be allowed to take plants into Indonesia, so we ended up with a lot of leftovers. 😅 My cousin Clara actually tried to take one home, despite knowing that it might be confiscated, and successfully got it out of Australia and… I think (if I remember correctly) she got it into Indonesia, but once she had to get her connecting flight, they said she couldn’t bring it into the country. Oh well, valiant effort. 😄
I’m very proud of my mum and so appreciative that she took the time to help put these wedding favours together. I know she was feeling very good about the work she had done on them too. Now she has a lot of leftover ones at home. 🌵
I think the succulents were a hit with the guests. I hope most of them remembered to take them home. Our MC did announce this and remind the guests towards the end of the night, but I realised it actually wasn’t very clear that the succulents were actually the wedding favours. 😅
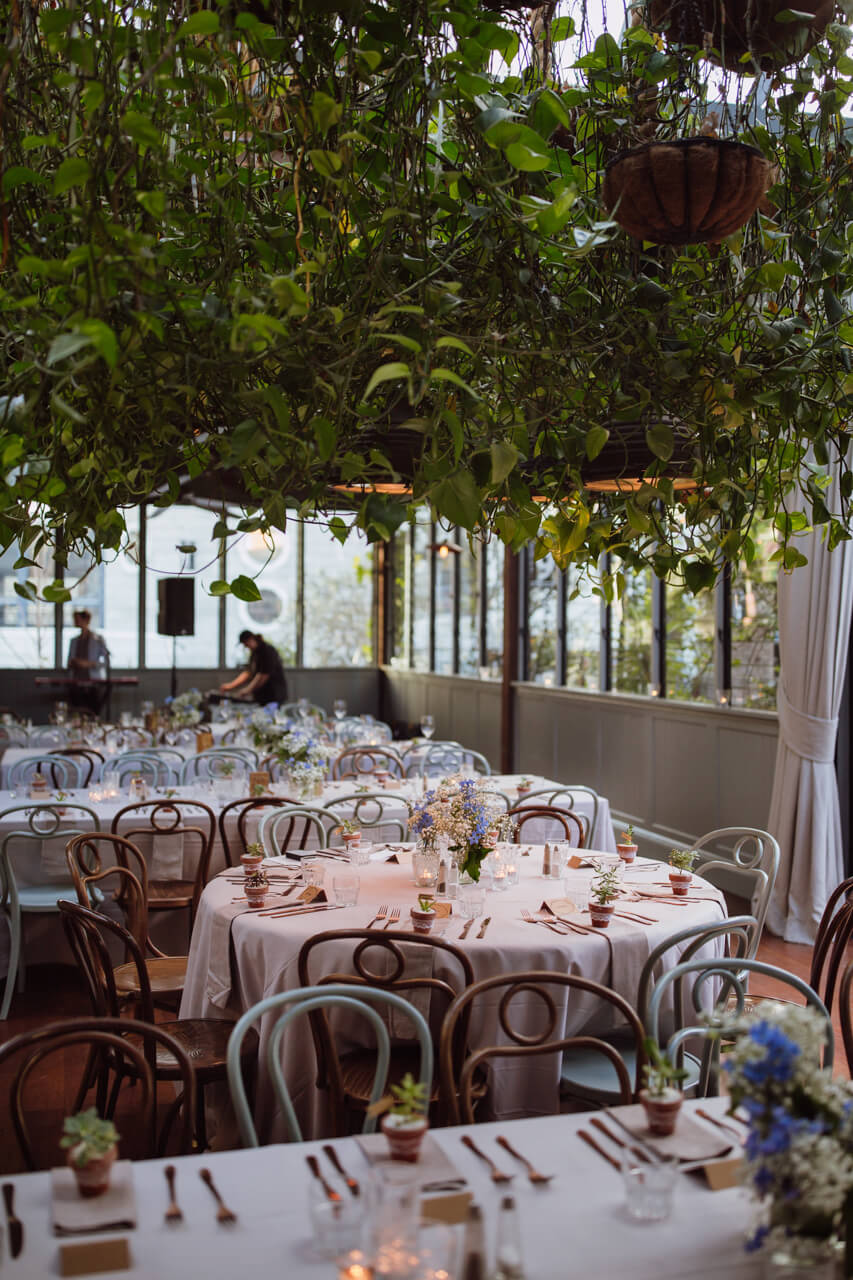
I am still glad they turned out the way they did, and I think they really added to the style of the venue and went well with everything else.
Comments on this post
Hiro
Holy smokes. I came here thinking I’m gonna see some cute pictures. But wow. That is amazing level of dexterity, planning, and crafting for the gifts!!
My boyfriend recently got a succulent as a favor for the wedding, but they just kept it in the cheap plastic container that they bought it in, so like you guys crafted to prevent, stuff are falling out of the bottom, if I water it, it just pours right out… I was like, The LEAST they could’ve done is re-potted them! But now I also see that there’s heck ton of work that goes into that!! (Looks like all they did was just go out and buy a bunch the week before or something though…)
I’m super impressed you guys made 100+ labels by hand!! I’m surprised you guys weren’t permanently cramped after that! And all the details that went into the mesh bottoms, and gluing the pebbles… I wonder if people could appreciate all the work that went into this without reading this! This is phenomenal!
Thanks for sharing! I might have to try this for something in the future, but I can keep this post in mind and know what I need to do to keep a disaster from happening! (And your mom seems super savvy… And yeah that whole #WeddingTax is LAME!)
Jane
If there’s a hole in the bottom, you might be able to stuff a small wad of a coffee filter inside. It’ll still assist with drainage, but should help keep the water from running straight through.
Jane
Although, alternatively, there are sometimes pots that look nicer that you can set the less nice pot inside. It’s not ideal, but if you don’t want to replant it anytime soon, it’s a quick fix that works well. :)
Hiro
That’s true!! For now, I’ve left it on top of folded paper napkins…. 🤣🤣🤣
Jane
It seems like the kinds your mum bred are ones that breed like rabbits. Er, they all do, but some can be bred more, like ghosty succulents. Their leaves can be used individually to make new succulents. Not all come out successful, but it’s definitely one of the easiest to breed indoors, probably.
I’ve seen a lot of products for weddings/wedding buyers, and it strikes me as weird that they’re literally ordinary things, most of the time, but it’s like putting “wedding” on them makes them different or some kind of special. Even though they’re the same. It’s like the better women’s razors vs. the average men’s razors: The only difference is the price and women apparently needing to experience razor burn through cheap razors.
Ahh! I guess it’s too late now, but if you guys have coffee filters there, they’re biodegradable and also work well. Smaller ones are easier, but over all, they really help with drainage and keep a) the soil from falling out and b) water running right through.
DO YOU KNOW WHAT FLAGS REMIND ME OF? SHIPPING THINGS. IDK what your ship name is. I actually tried thinking of something before, but they all sounded really dirty, so I stopped. 😅😳
Anyway, I sooo loved this post because succulents! I I was also hoping you’d blog about it (I think I even asked some time ago, when you first mentioned it, heh), so I’m glad you posted about it!
Rezina
Omg the party favors are sooo cute.
That’s so amazing that your mom grew all the succulents??? I have a hard time even keeping my succulent alive, haha. And it’s cuter that every pot was hand labeled with names! Kudos to your mom and yourself–the pots turned out really cute!
catherine
These are so cute and creative! I can’t believe you made 100 though :o I hope they are all still well. As an aside, you could have completly sealed the pot/bought a sealed pot and lined the bottom with gravel to get drainage. : )
Sakura
Wow! That’s a very sweet wedding present for your guests. Lots of effort and preparation involved too. It is not the usual kind of wedding gifts you get at weddings too. Glad that your MC announced it to make it more obvious to your guests.
Chynna
Little succulents are my favourite! This is such a cute idea. I have a small cactus on my desk at work and people always come over to say hi to it XD
I don’t think I’ve mentioned it before but you looked absolutely STUNNING at your wedding. You and Nick were both glowing. I love seeing your photos on my timeline when you do post them. So, so gorgeous.
Your mum is amazing for sorting out the succulents! I can’t believe that she managed to have more that 110. That’s crazy. And they all look so pretty and cute, as well.
Ashley
Wow! So much creative and awesome work as put into those wedding favors. They look so lovely. Your mom is a talented green thumb that is for sure. I probably would have killed everything trying. haha orz
Kirsten
Wow! The planning and detail that went into those succulents! I really love how they turned out :) It brought back memories from the DIY stuff my mom and family and I did for our wedding. It was so much fun!
Heather
These are absolutely adorable and such a great way for your guests to remember your wedding! I think it’s also a lovely way for you and your mum to have worked on your wedding together, and for her to feel like she was a big part of your big day :)
Victoria
So glad I found this post!!
I have literally done all of the above (besides pebbles and bottom lining of the pots). I am 4 months out for my wedding and thought I planted mine wayyyy too early but your post makes me feel better haha..
How often did you water them up until the wedding!? Any extra pointers on care for them until November? I’m in SA Australia so winter here right now so don’t think I need to water too regularly…
THANKYOU!!
X
Georgie
Hey Victoria! I’m glad you found my blog post helpful – really excited for you and for the upcoming wedding! I live in Sydney so you’re probably experiencing the same sort of weather 😊 I can’t remember how often we watered them, maybe about twice a week, but we made sure to give them a pretty substantial water, basically until the soil was wet but not soaking wet. If you’ve taken care of succulents before, you’ll find that sometimes after getting a big drink, they shoot up and grow pretty quickly. So it really depends on how big you want them to be by the time the wedding rolls around. We wanted them to still be pretty small so they wouldn’t look like they were overpowering the pots they were in.
My general recommendation would be to water them at least a couple of times a week and watch how big they’re getting, then water them less as time goes by, if they are already as big as you want. It’s safe to leave succulents for a while but as the wedding date draws closer, start to give them more water.
Worst case scenario you can split a too-large one into more pots, so you’re probably better off letting them get a bit too big, than having sad and tiny plants on your wedding day, or having them die. It’s possible you might have a few die on you, so letting them get bigger or accounting for extra is a good backup.
We still have ours two years on and we’ve kept them fairly small, but my parents-in-law repotted theirs since they grew much larger! Hope this helps you and feel free to let me know if you have any other questions.
Victoria
Thanks so much for your reassurance and help :)
X
Easther Sudharta
Congrats! Wow! These are great!Thanks for sharing such a great ideas of Diy succulents favours. These are unique If I may know what glue for the pebbles did you use?
Thanks
Georgie
Hey Easther! I’m glad you enjoyed reading about it. We used Boyle Craft Glue, which you can purchase from Bunnings. Some of the properties are that it dries quickly, dries clear, and can be used for wood, ceramics, metal, fabric, and leather. If you want to try it yourself, you’ll have to apply a few layers to it and let each layer dry.